Reusable Logic
Unit Objectives
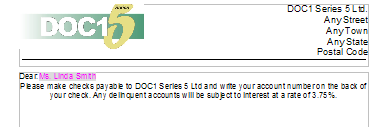
In this unit we will create Active Content which is a segment of the document that acts as an independent file. The concept of capturing a part of a field via substring will be demonstrated. Pulling multiple values together using the concatenation function will be discussed. Finally we will create a barcode that will be placed below the address block.
In this exercise you will create a remittance slip.

2. Duplicating a Publication
In this section we will duplicate the Offer Letter and reuse it for the Summary Statement.
- 1. In the Work Center Manager click on Design tab, Publications bar.
- 2. Double-click the Company Letters project folder.
- 3. Select Offer Letter publication.
- 4. From the main menu select Edit/ Copy.
- 5. From the main menu select Edit/ Paste.
- 6. Right-click the Copy of Offer Letter.
- 7. Select Rename.
- 8. Type, Summary Statement.
- 9. Press Enter.
- 10. Double-click Summary Statement.
-
11. Delete the Section icon.
3. Concatenation
- 1. In your document mark your cursor at the top left of the page.
- 2. Type Dear:
- 3. From the main menu, select Insert / Field / Concatenation.
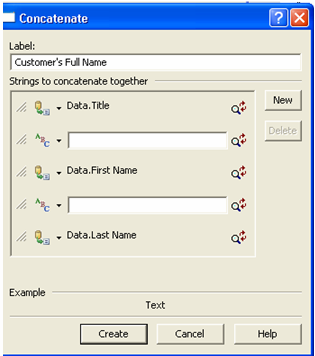
- 4. Label, type Customer’s Full Name.
-
5. Click the New button.

- 7. Select Data Field.
- 8. Use the drop down and select the Summary Dictionary.
- 9. Click the New Alias button.
- 10. Name, type, Title.
- 11. Type, select, String.
- 12. Example, type, Ms.
- 13. Click OK, OK.
Since we trimmed all extra spaces in the import phase, we need to add a space to separate the data fields.
- 16. Select Constant, String.
- 17. Click the spacebar.
- 18. Repeat the same process for the following:
-
19. Click Create.

- 1. From the main menu select Insert/ Presentation Object/ RTF.
- 2. Select Summary.rtf.
- 3. Click Open.
- 4. From the Standard toolbar click, the Save icon.
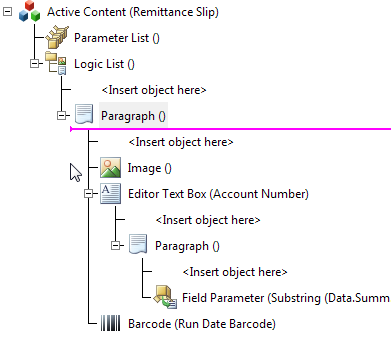
4. Active Content
Active Content is the term for a sub-routine containing a segment of document logic and or presentation objects.
In this section we will create an Active Content object that we are going to later place in the Summary Statement.
- 1. In the Work Center Manager click on Design tab, Active Content bar.
- 2. Double-click the Company Letters project folder.
- 3. From the main menu select File/ New Active Content.
- 4. Type, Remittance Slip.
- 5. Press Enter.
- 6. Label, ensure, Remittance Slip.
- 7. Click OK.

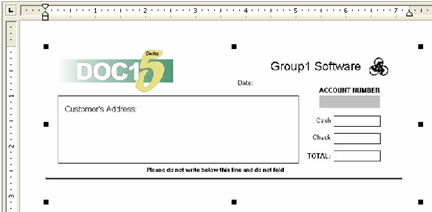
Now we are going to place an image.
- 1. In the logic map, mark your insertion point at Logic List () <Insert object here>.
- 2. From the main menu select Insert/ Presentation Object/ Image.
- 3. In the Company Letters project folder, double-click remitslip.bmp.
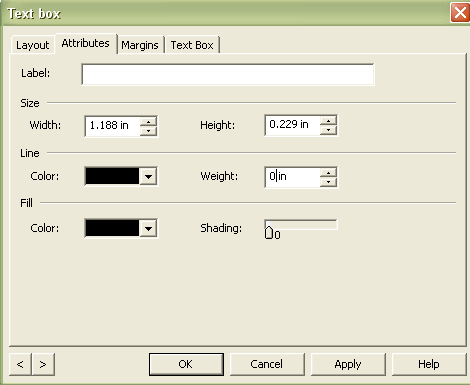
- 4. From the main menu select Format/ Shape.
- 5. Select the Layout tab.
- 6. Flow, select Anchored.
- 7. Click the Behind Text runaround icon.
- 8. Ensure the X and Y positions are both 0.
- 9. Click OK.
5. Substring
Substring extracts one or more consecutive characters from within a text string. In this section we are going to substring the Account Number so that we pull the fifth byte, starting from the second byte.
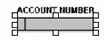
- 1. In your document mark your cursor in the Account Number text box.
- 2. Set the font to Arial, 12, Bold, Center Alignment.
-
3. From the main menu select Insert/ Field/ Substring.
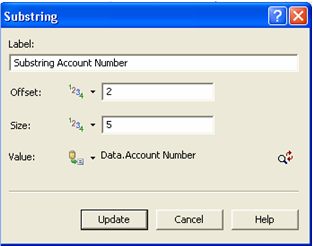
We will build a new alias for our data field Account Number.
- 2. Value, select Data Field.
- 3. Click the New Alias button.
- 4. In the Dictionary drop down, select Summary.
- 5. Name, type, Account Number.
- 6. Type, select, String.
- 7. Example, type, RTY345678.
- 8. Click OK.
- 9. Click Create.
- 10. From the Standard toolbar click, the Save icon.

6. Barcode
The barcode function converts characters and numbers to the appropriate sequence of lines that are required for the selected type of barcode. Series 5 supports a range of standard barcode types, as the barcode fonts are automatically installed in the Work Center and available for all drivers and variants.
Next we will add a Data Matrix barcode that consists of the system variable run date.

- 2. From the main menu select Insert/ Presentation Objects/ Barcode.
- 3. Label, type, Run Date Barcode.
- 4. Value, click
 .
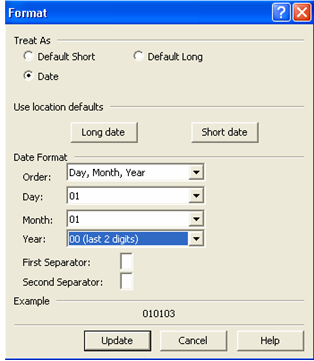
.We are going to format the date so it reads ddmmyy.

-
3. Date Format:
Order, select, Day, Month Year.
Day, select 01.
Month, select, 01.
Year, select 00 (last 2 digits). -
4. Click Update..


7. Insert Active Content into the Summary Statement
We will insert the active content into the Summary Statement.
- 1. In the Work Center Manager click on Design tab, Publications bar.
- 2. Double-click Summary Statement.
- 3. In the document, mark your cursor after 3.75%.
- 4. Press Shift + Enter 11 times.
- 5. From the main menu select Insert/ Control Objects/Active Content / Active Content.
- 6. Label, type, Remittance Slip.
- 7. Double click the Company Letters folder icon.
- 8. Select Remittance Slip business logic.
- 9. Click Open.