Multiple Output Streams
1. Unit Objectives
The aim of this unit is to understand how preview works and extend our knowledge of publishing.
2. Preview
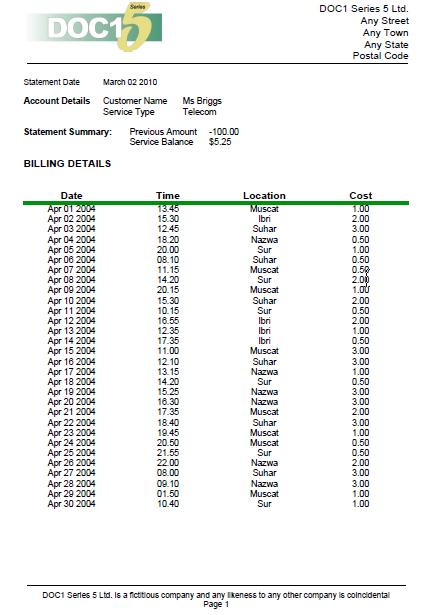
Previewing allows you to run a publication through the Series 5 production engine within the Work Center, itself without the need to go through the formal publication and deployment process. It produces a PDF version of the intended output and displays it in a Work Center window for your review.
Previewing uses the sample data currently assigned to a publication as the input data that would normally be passed to DOC1 Generate in a true production run.
If you have unresolved data aliases in your publication design you will be asked to map them to actual data elements (as defined in a data format) just as you would with the regular publishing process. As with regular publishing you must have a data format for your publication in place before you can run preview.
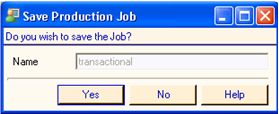
3. Publication View
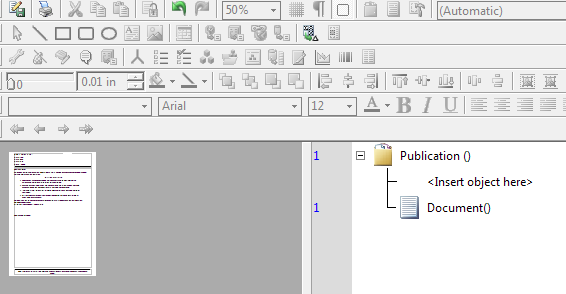
- 2. In the logic map, double-click on Publication ().
- 3. Label, type, Transactional Statement.
- 4. Data Map, click
 .
.- 5. Double-click the Company Letters project folder.
- 6. Click Transactional data map.
- 7. Click Open.
- 8. Click OK.

4. Multiple Publishing
We can also set up a publishing task that will create more than one output document. We can output multiple, different documents in one run, or output one document in multiple formats. We will go through the steps for publishing our transaction document, and create an output .pdf and .afp.
- 1. In the Work Center Manager click on Design tab, Publications bar.
- 2. Double-click the Company Letters project folder.
- 3. Highlight, Transactional Statement publication.
- 4. From the main menu select Tasks/ Publish Current Draft
- 5. Click Next..

We do not need to associate a data map because we already associated it in the Publication View.
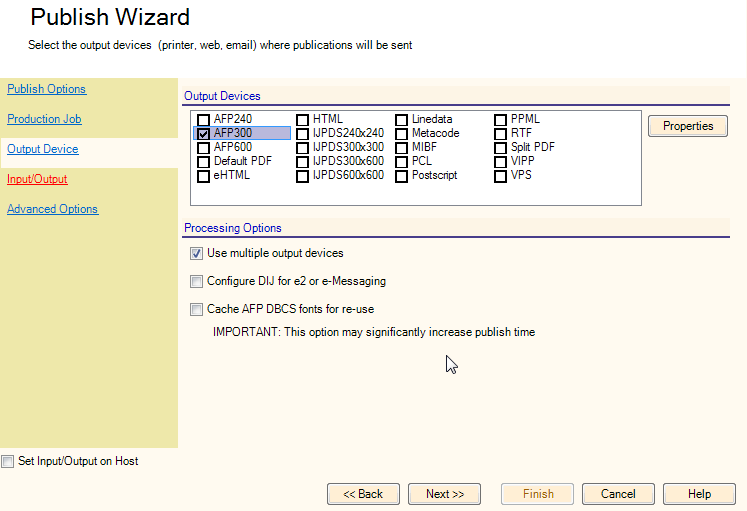
Lets continue with the Publish Wizard and select multiple output devices.
- 1. Click on Next.
- 2. Processing Options, click, Use multiple output devices checkbox.
- 3. Output Devices, click, Split PDF and AFP300 checkboxes.
- 4. Click Next.
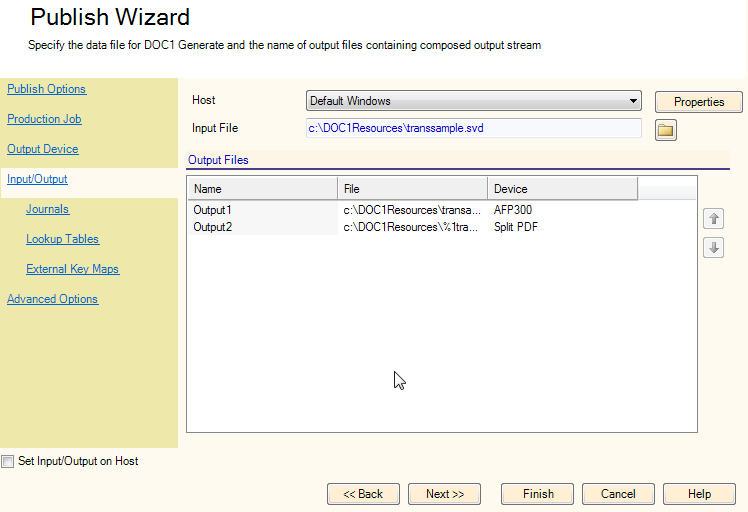
Next we will specify the location of the sample data file.
The Output1 files window specifies the location and output datastream file.
- 6. In the Output Files window, double-click, Output2.
- 7. File, type, c:\DOC1Resources\%1transactional.pdf.
- 8. Click OK.
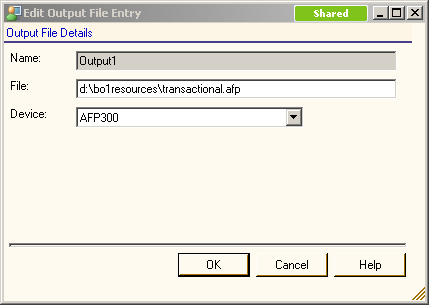
Now we are going to add the .afp output stream.
- 1. In the Output Files window, double-click, Output1.
- 2. File, type, c:\DOC1Resources\transactional.afp.
A .hip file will be created and placed into your resources folder.
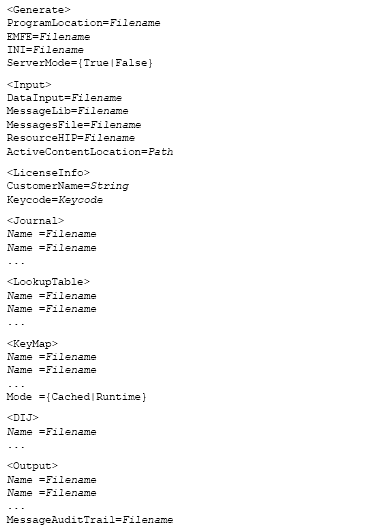
5. *.OPS File
An override production settings (.ops) file allows you to specify supplements and alternatives to some of the job settings that were used when publishing a publication design.
The use of an OPS file is optional unless you have not specified all file references and/or license data in the publishing task.
An OPS is a text file. Options are coded as keywords and associated parameters within several distinct sections. Sections must be introduced with the relevant name within angle brackets, for instance: <Journal>.
No sections or keywords are compulsory and you should code only those options that suit your requirements. All missing options are assumed to have been specified as part of the publishing task.
All file references can include both path and file name as required. Ensure that you code all such references in a format suitable to the operating system under which you are running the production engine.
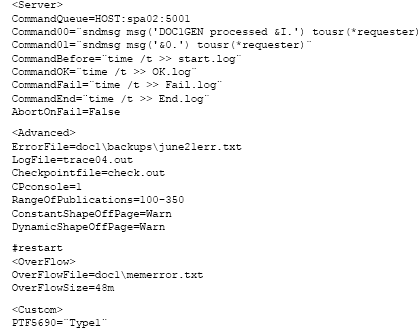
We will create an ops file that will send the pdf to our resources folder, and send the afp directly to the c: drive root.
-
2. Type,
<Output>
Output1=c:\DOC1Resources\%1TransSample.pdf
Output2=c:\DOC1Resources\TransSample.afp - 3. Save the file in your resources directory as TransSample.ops.
- 4. Open, Notepad.
-
5. Type,
"c:\program files\group1\doc1\designer\client\doc1gen" “c:\ DOC1Resources\transactional.hip” ops=TransSample.ops
pause - 6. Save it as TransSample.cmd in your resources folder.
- 7. Double-click c:\DOC1Resources\TransSample.cmd.
Two new print streams are created in the specified locations.
6. Ops Complete Example
An OPS file can allow you to override production setting. The use of an OPS file is optional unless you have not specified all file references and license parameters within several distinct sections. Sections must be introduced with the relevant name with angled brackets (<>). Comments can be included in the OPS file but they must be prefixed with a semicolon character. No sections or keywords are compulsory and you should code only those options that meet your requirements. All missing options are assumed to have been specified as part of the publishing task.