Series 5 Basic Class - Self-Paced Modules
Reserved Areas
What is a reserved area?
A reserved area is a specialized kind of text box, and is created and styled in exactly the same way. It is different in that it can only be created in the background area, under the Page Setup view.
A Reserved Area is normally used to set aside a piece of the page to, for example, contain advertising blurbs.
Creating a Reserved Area
Let's create a reserved area and see how it works.
- Create a new, blank publication.
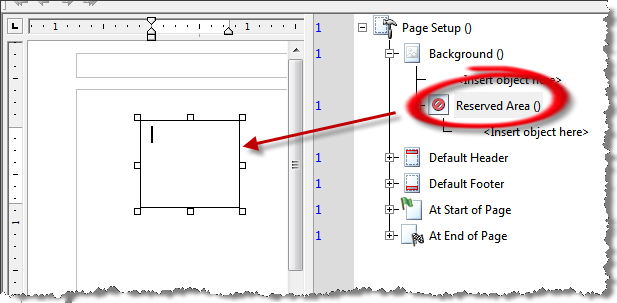
- In the logic map, right-click, select View Page Setup.
- In the logic map expand the background branch.
- Mark your insertion point at Background () <Insert object here>.
- From the main menu select Insert/ Tool Objects/ Reserved Area.
- Draw a reserved area anywhere in the document.
Formatting a Reserved Area
We can format this Reserved Area just like a text box.
- From the main menu select Format/ Shape.
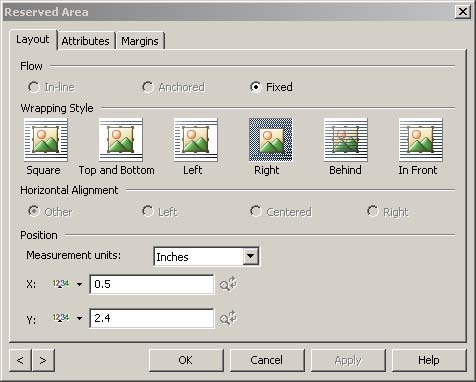
- Select the Layout tab.
- Click Right runaround icon.
- Position, X: 0.5 in Y: 2.4 in
- Select the Attributes tab.
- Size, Width: 1.85 in Height: 5 in.
- Line, Weight: 0 in.
- Click OK.
Properties of a Reserved Area
- Type some text inside the Reserved Area.
- Right click in the logic area and select Document View.
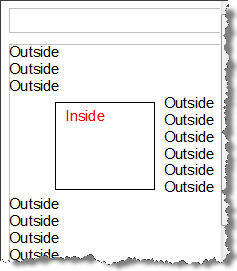
- Place your cursor above the Reserved Area and type several lines of text. Notice how the text automatically wraps around the Reserved Area in the background.